Redacto × Zapier — Setup Guide
Redacto is available in the Zapier Playground to enable downstream systems' alerting for consent events.
What And Why?
Prerequisites • A Zapier account with the right plan for multi-step Zaps (A Zap is Zapier jargon for an automation workflow ) and any premium apps you plan to use. On free plans, multi-step Zaps and premium apps can’t be published. 
• Your Redacto CMS API Key (how to get it: see Appendix).
• Access to Slack/Gmail/Mailchimp (or whichever apps you’ll use in the downstream steps).
• To start with creating Zaps, an organization and workspace should be configured for the redacto Consent Management System.
Note: If you don’t see Redacto in Zapier’s app directory yet, the app may still be in public beta. Ask your Redacto admin for the invite link while we’re in beta; after ~90 days apps graduate to public listing. 
Detailed Tutorial
-
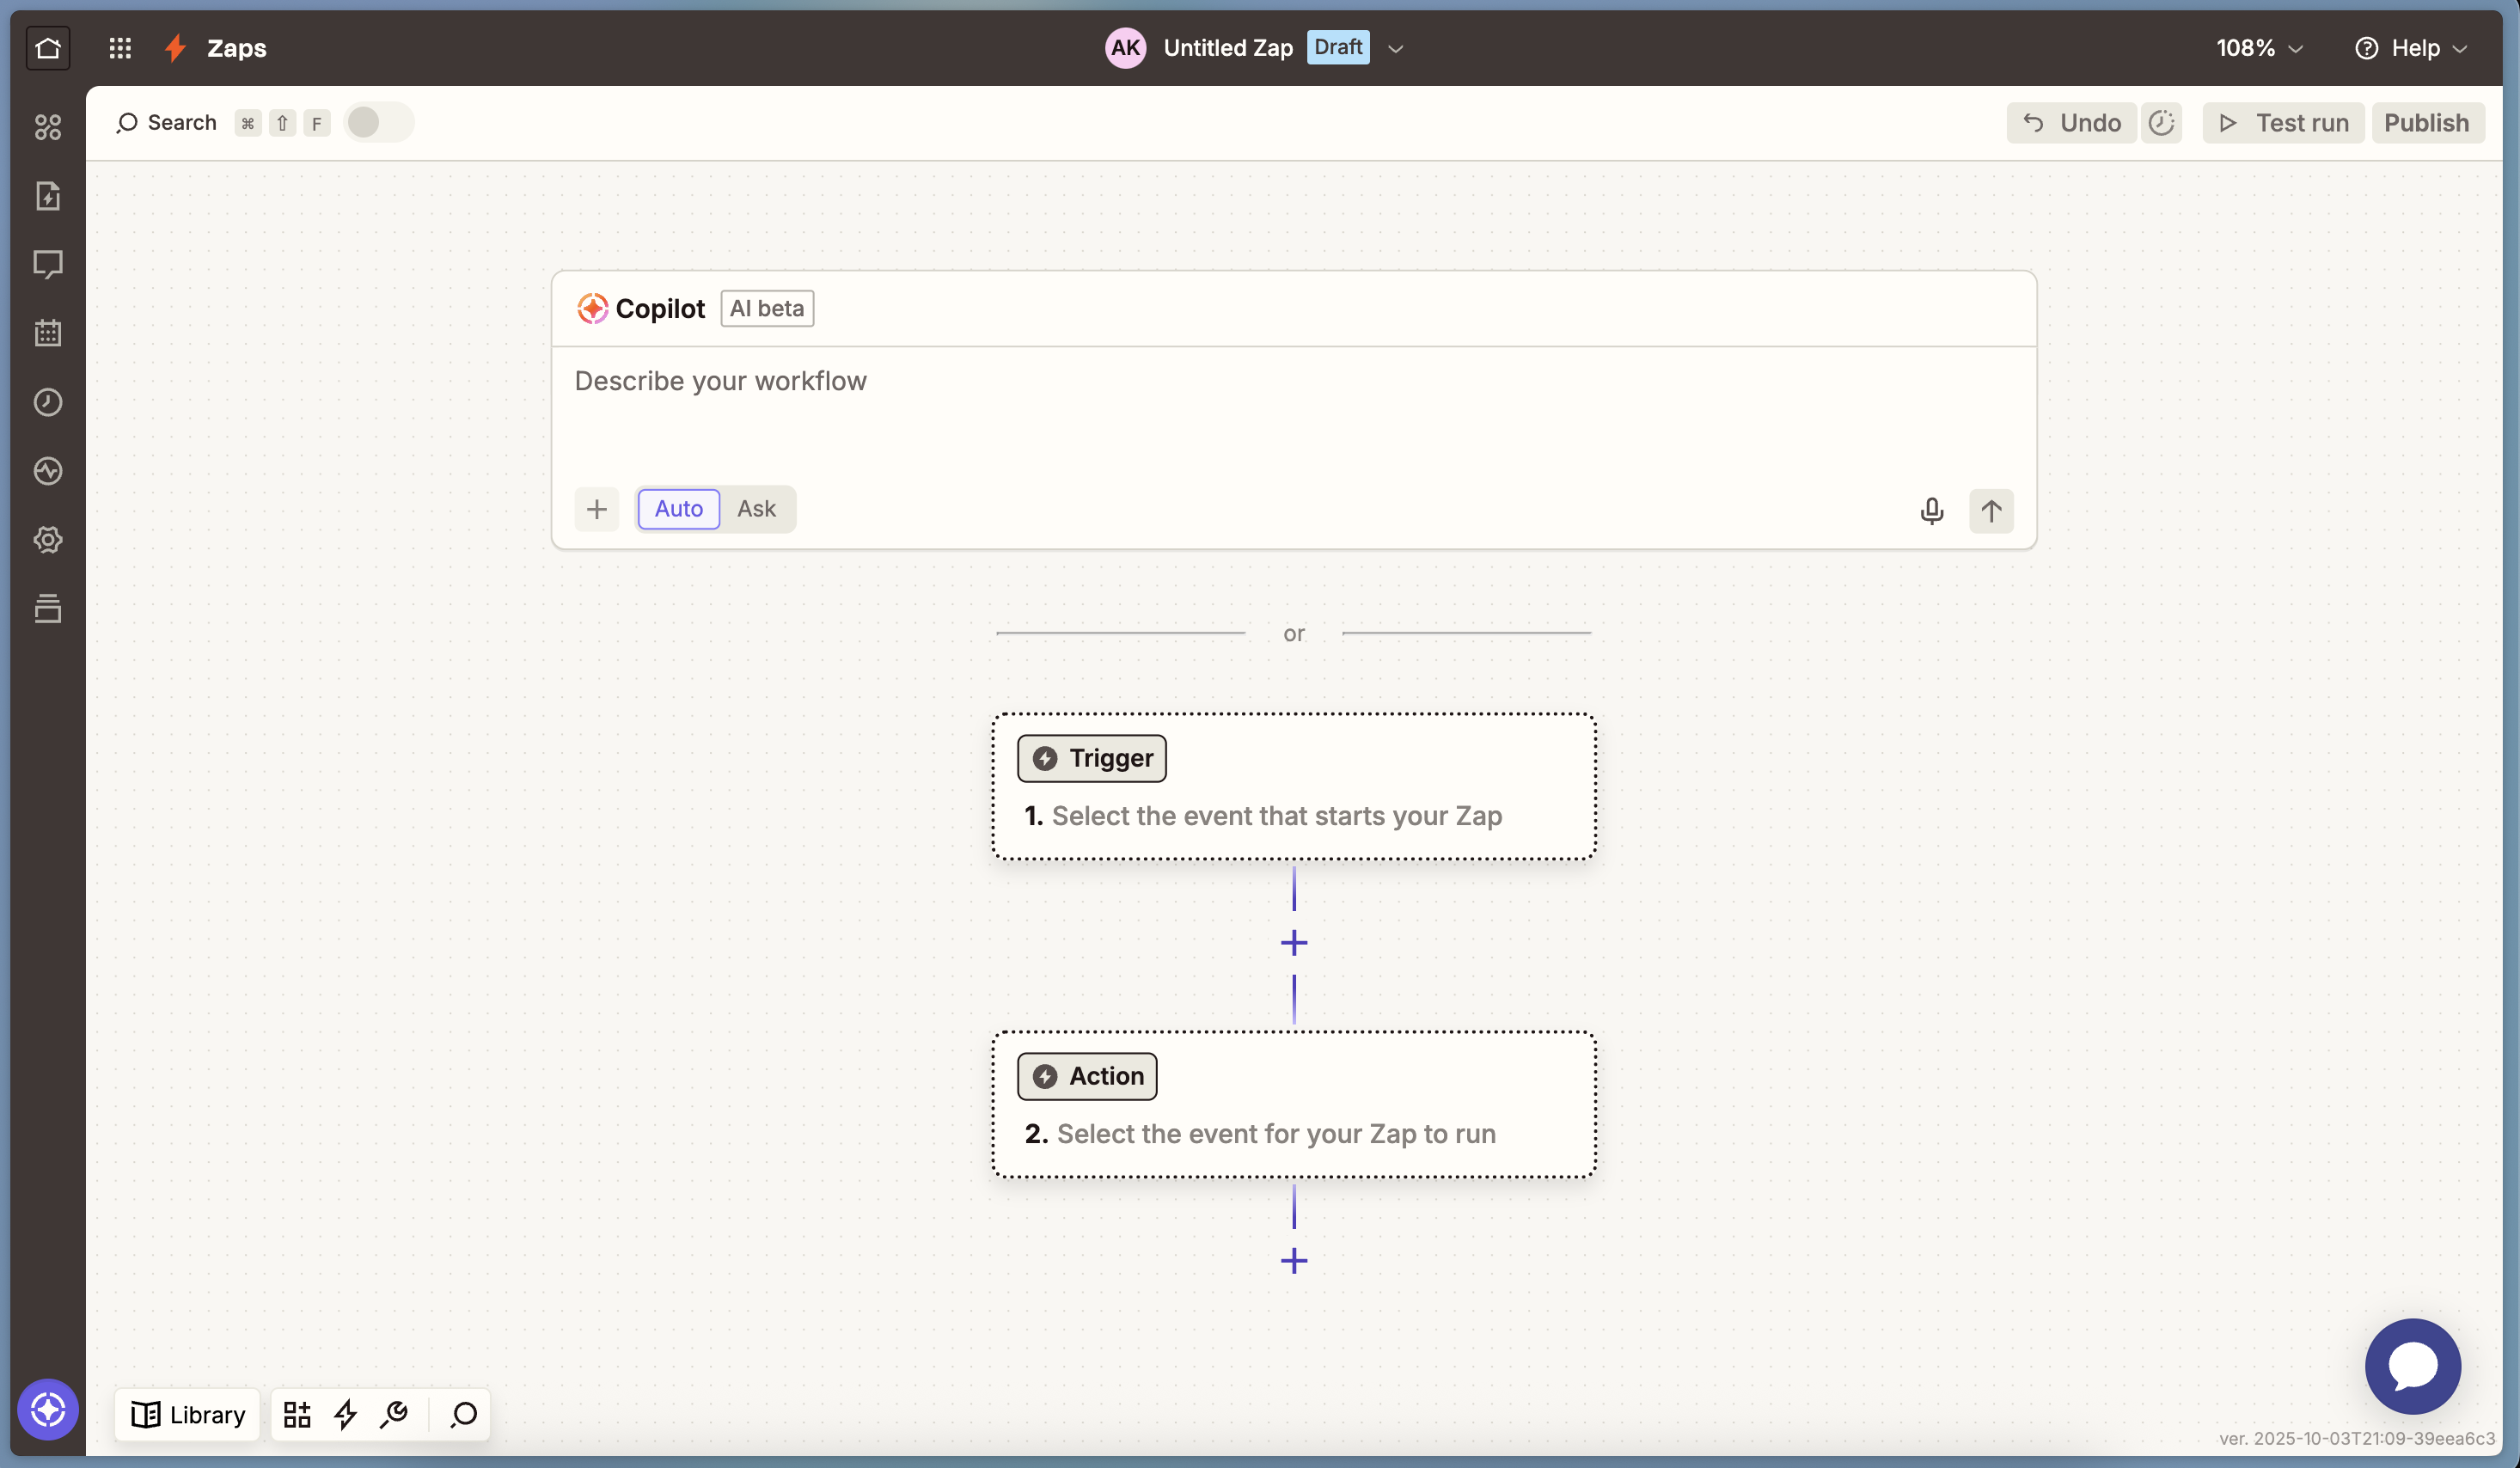
Create a new Zap
- Sign in to Zapier.
- Click Create → Zaps to open the Zap editor. • You’ll configure a trigger (what starts the Zap) and actions (what happens next).
-
Connect Redacto (API Key authentication)
-
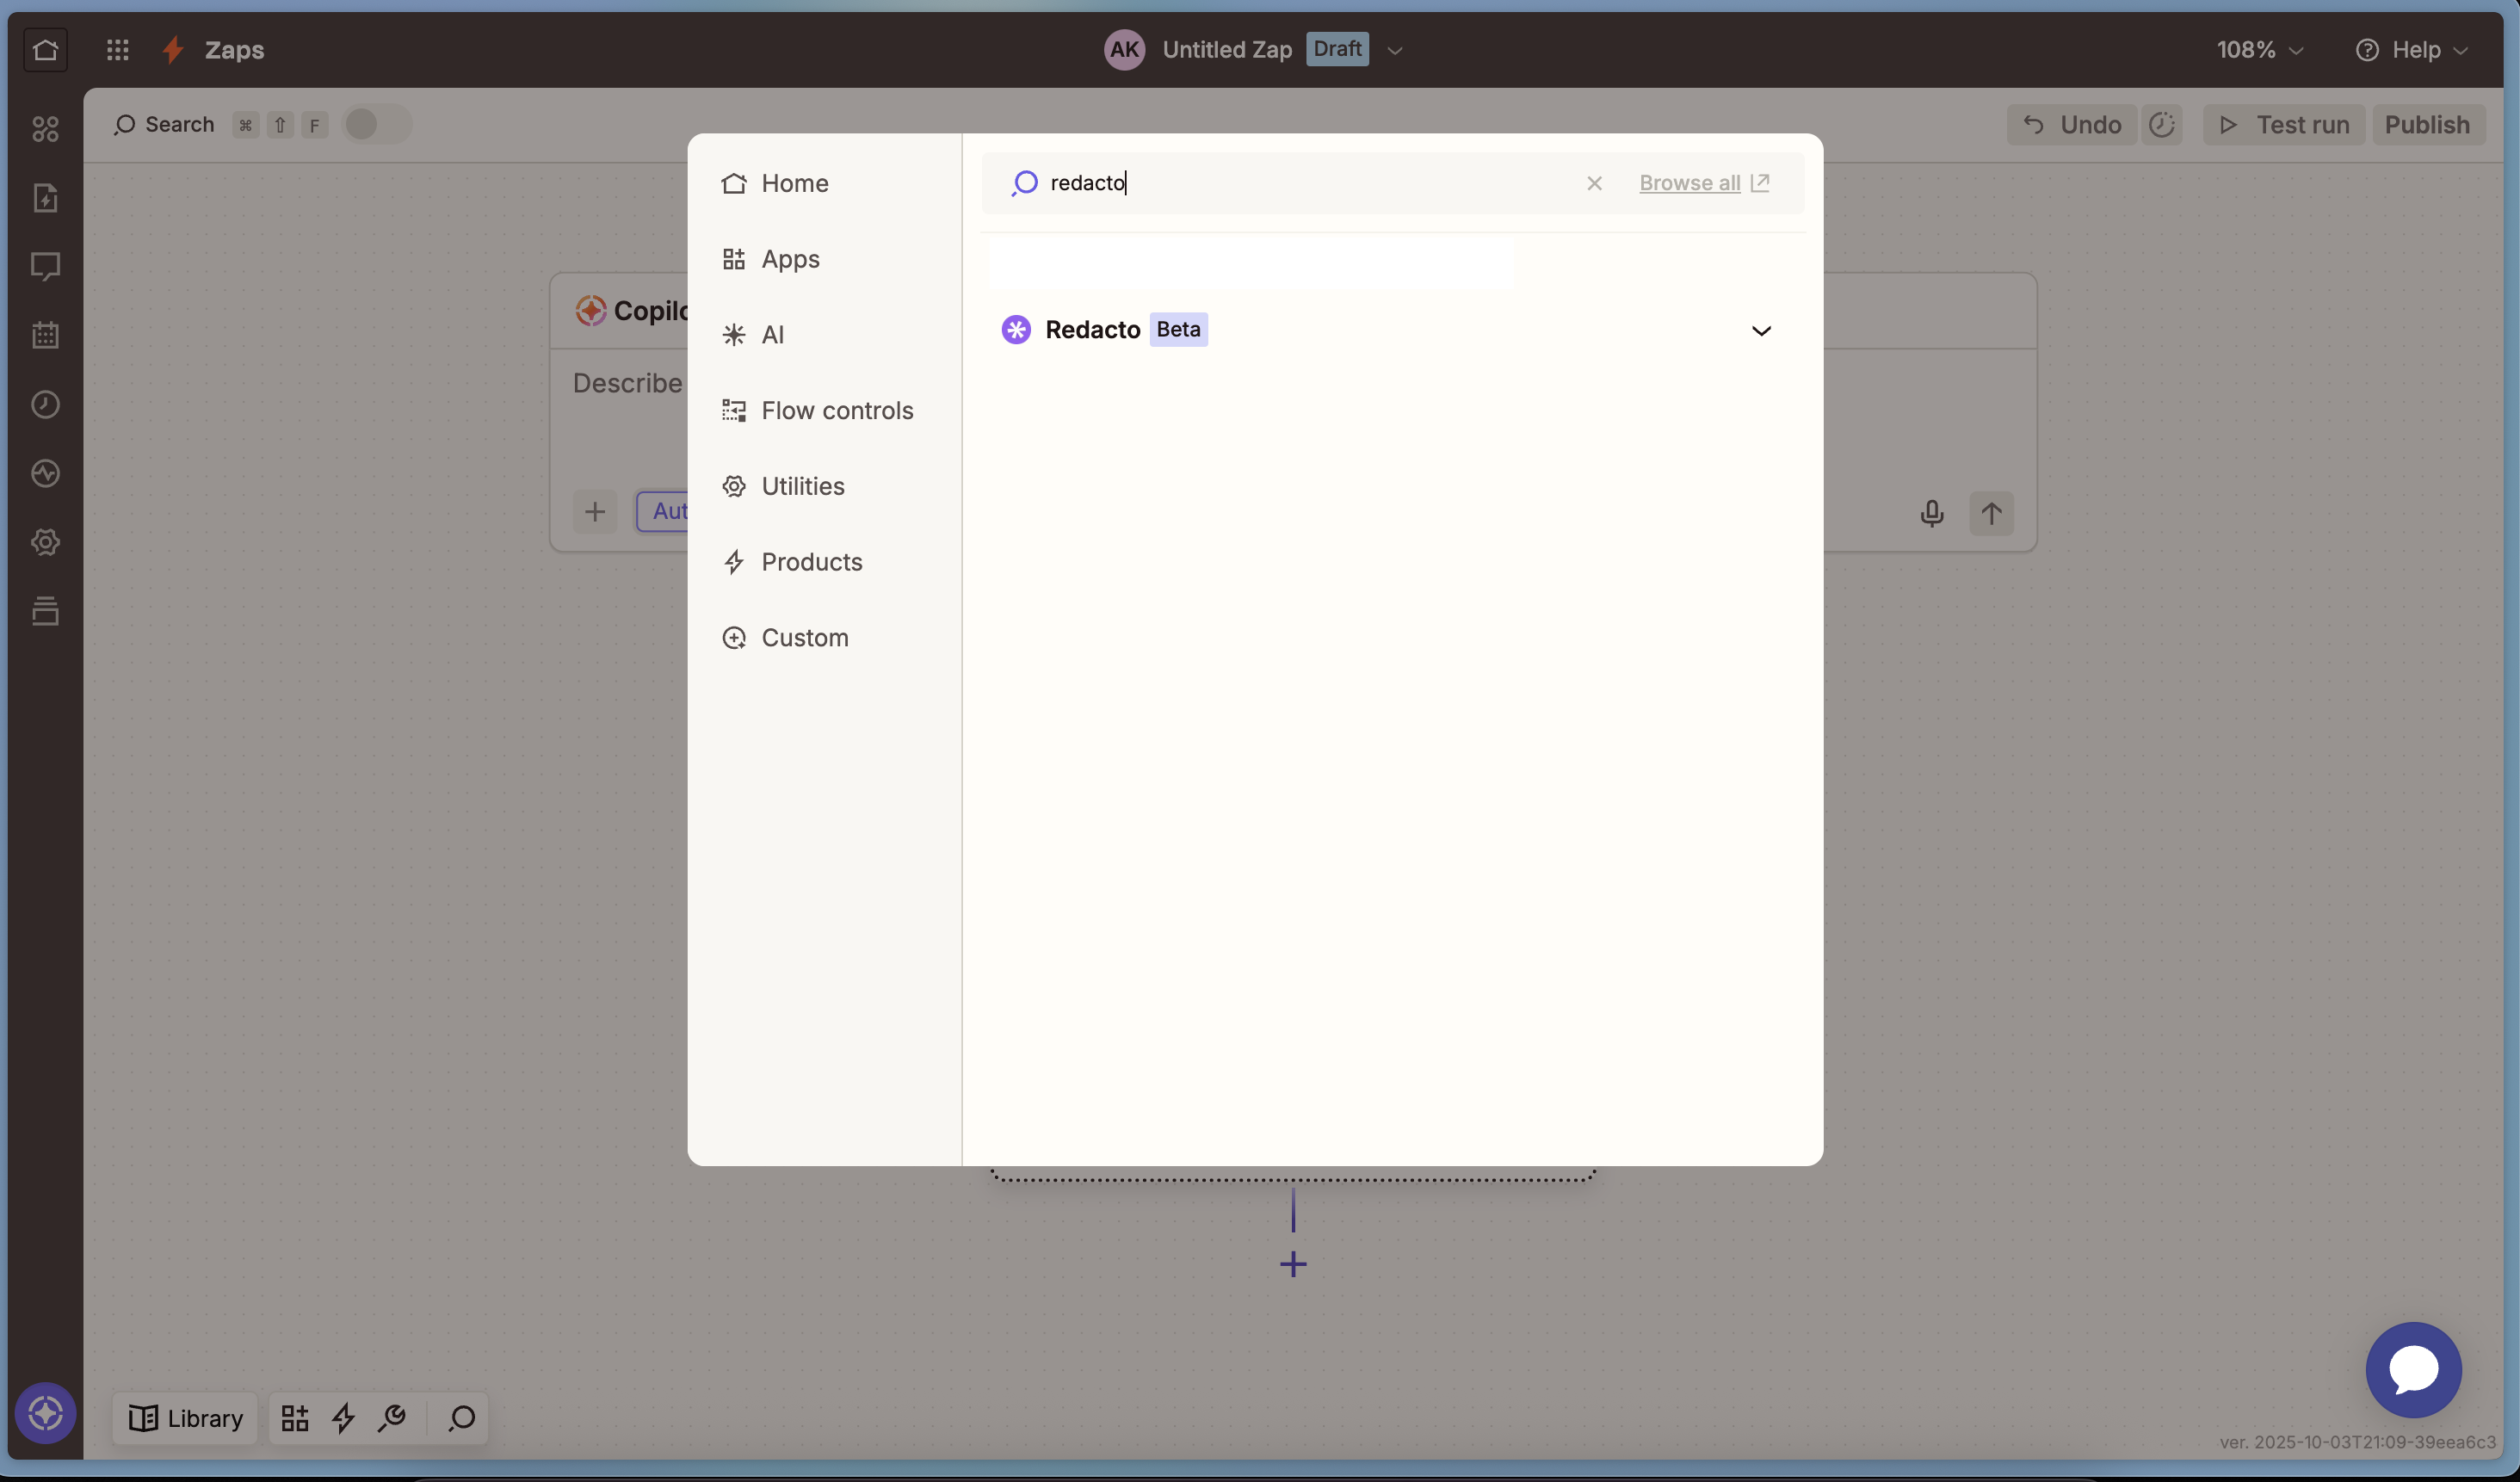
In the Trigger step, search for Redacto.
-
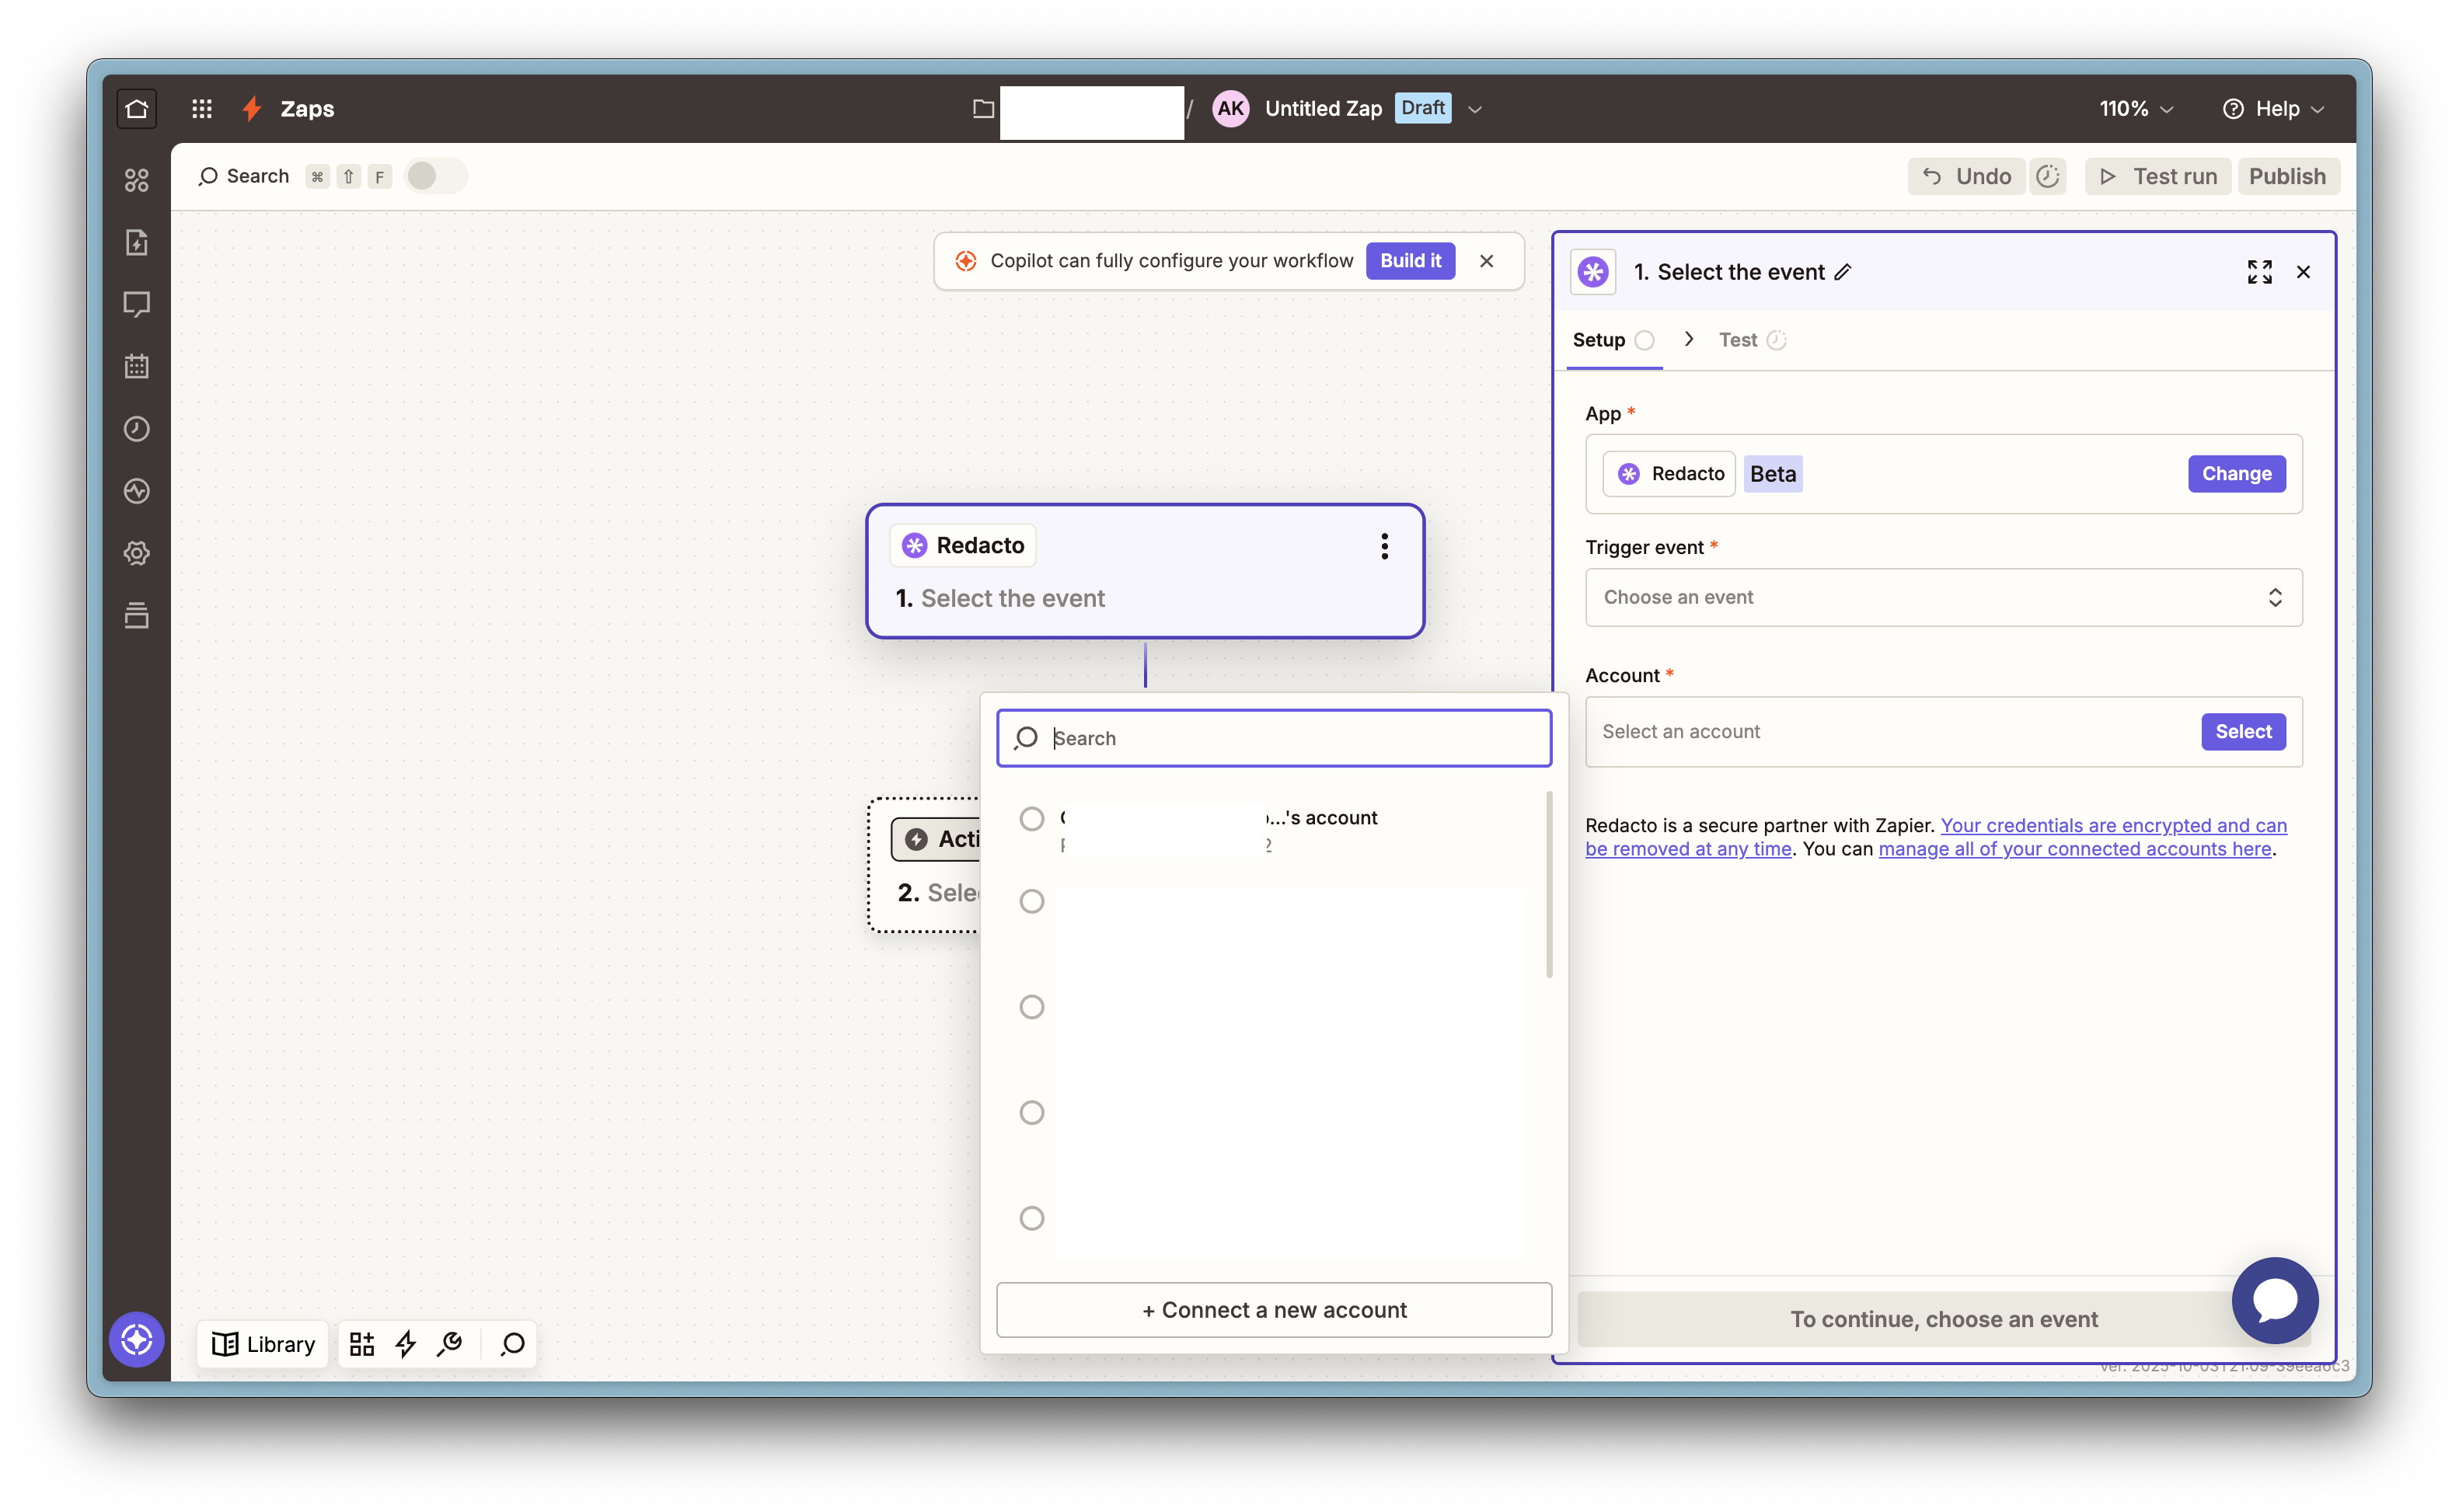
In the Account field, you can select which Redacto account you want to proceed with. This can either be an old account or you can click "+ Connect a new account".
-
When prompted, paste your CMS API Key and complete the connection.

-
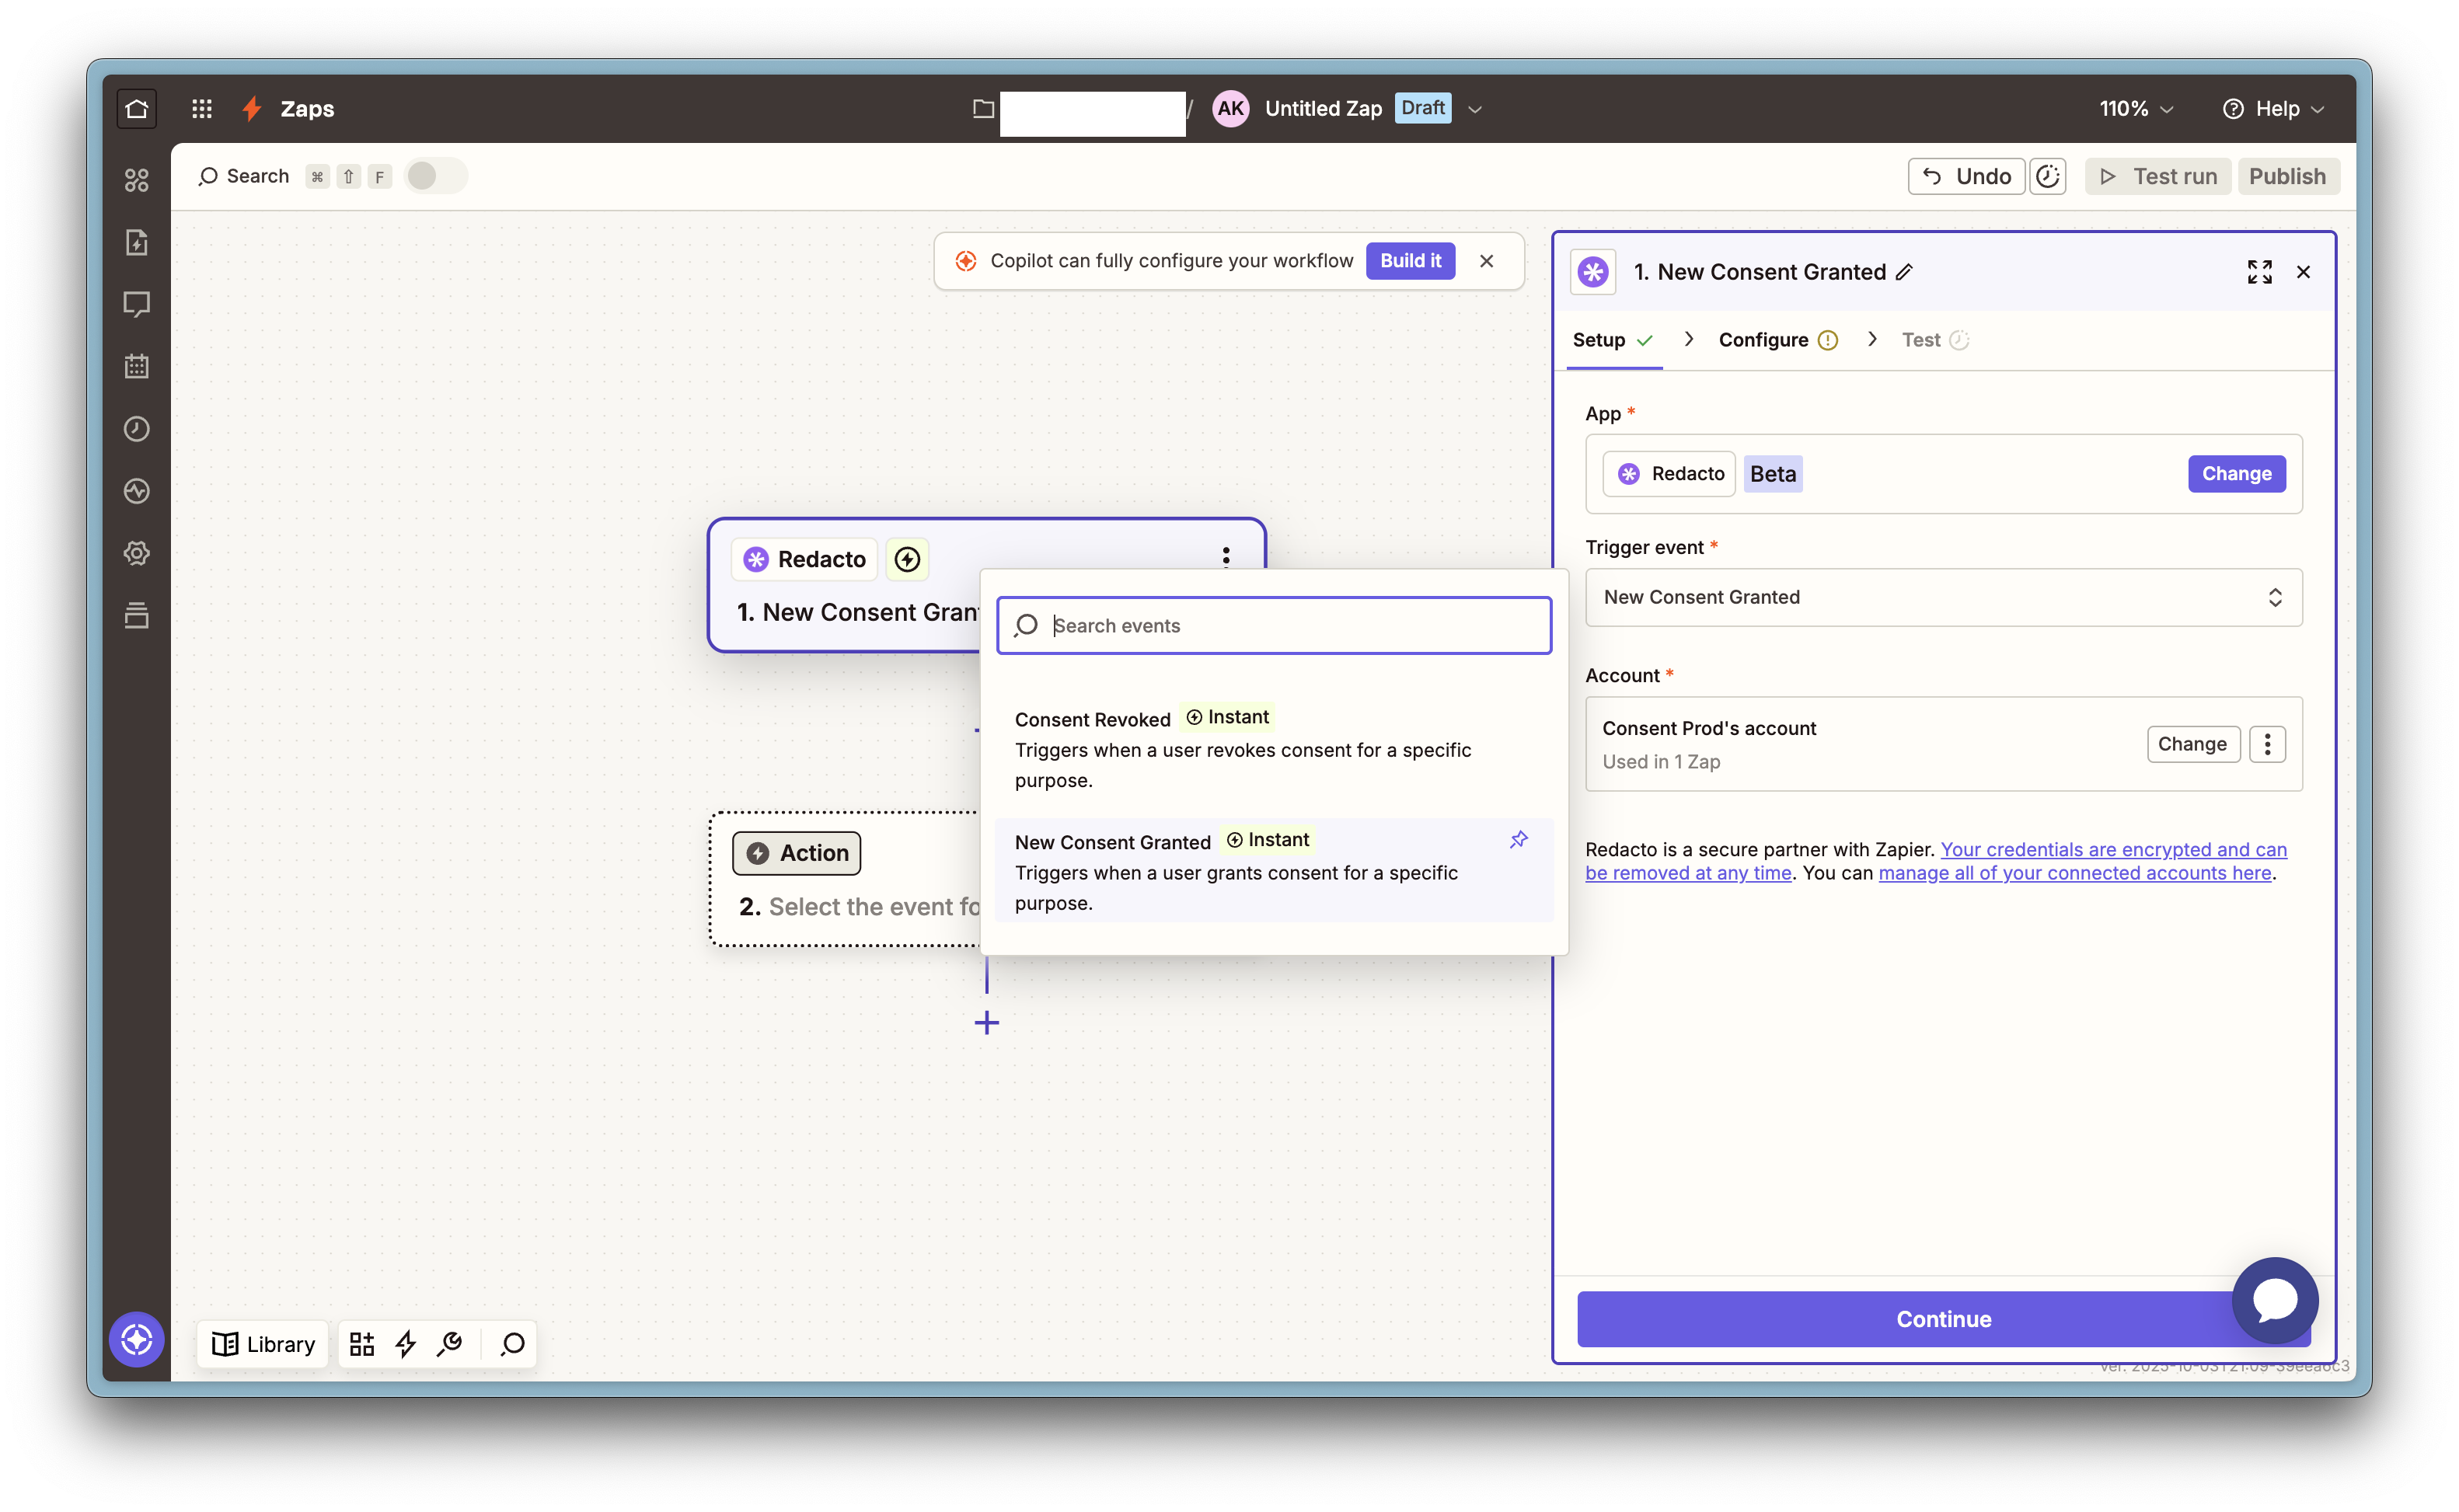
- Choose a Redacto trigger
- In Trigger event, select one of: • Grant Consent • Revoke Consent Each trigger represents a specific consent event type.
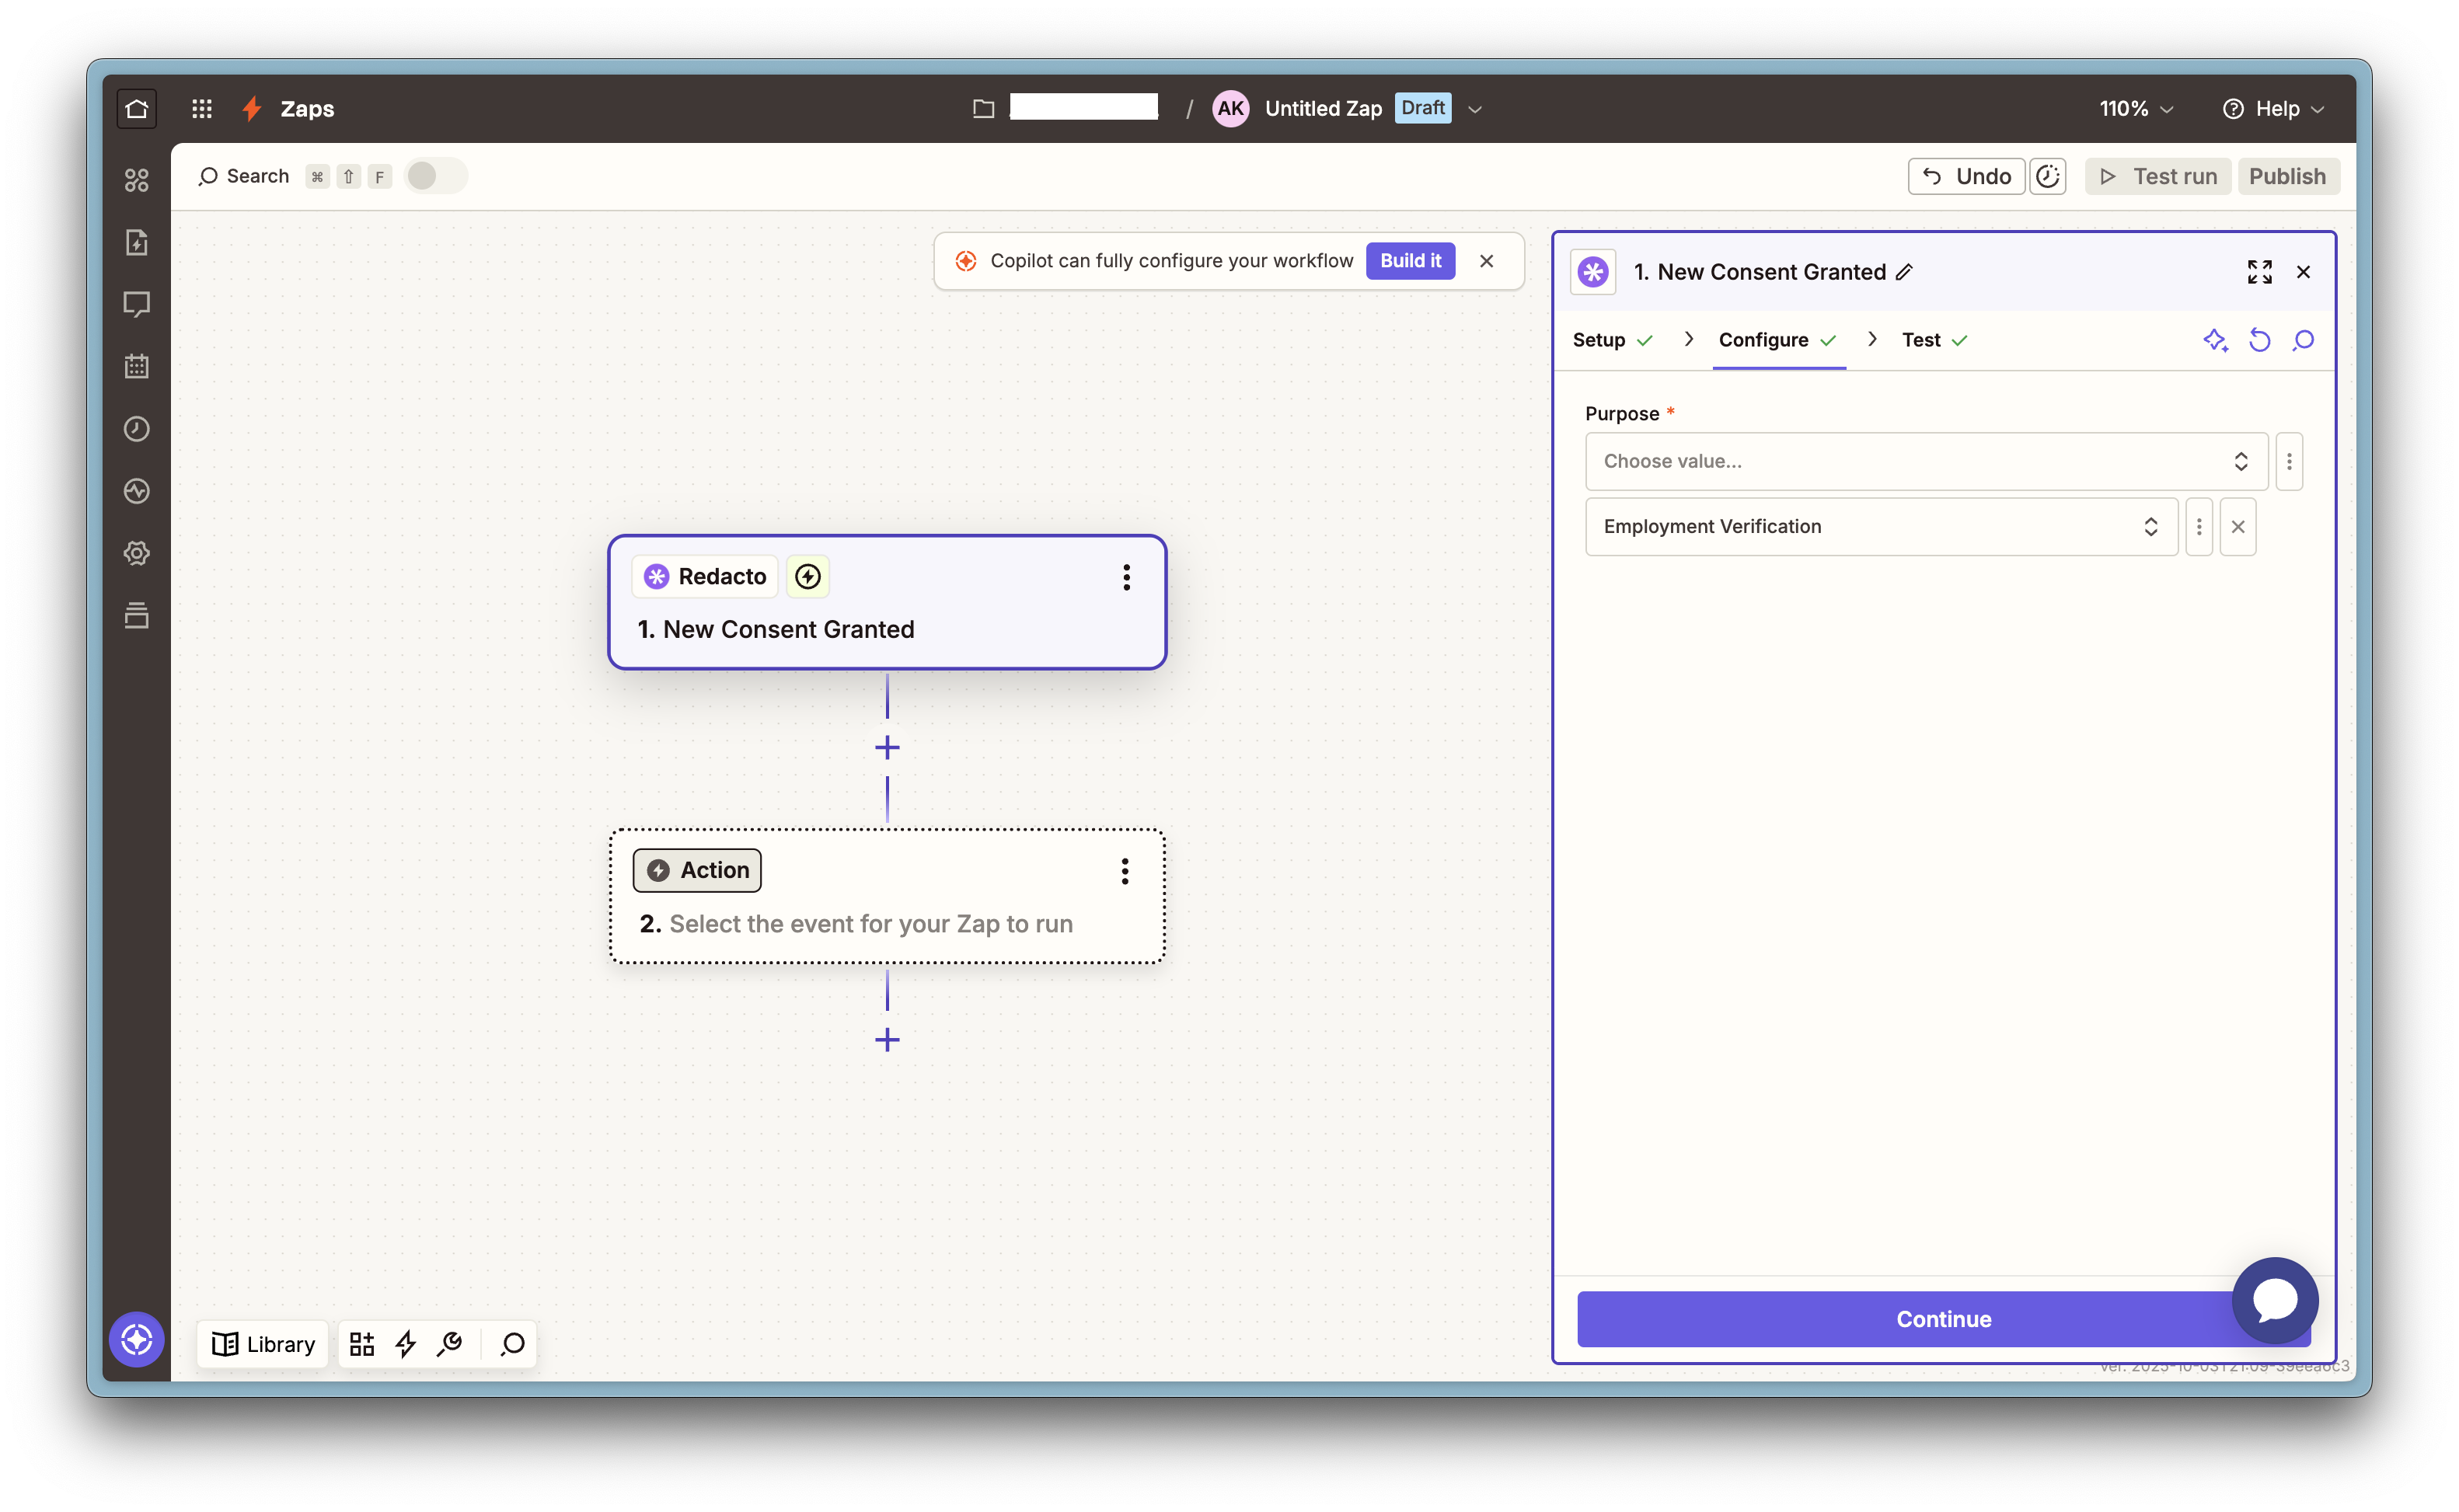
- Configure any required fields for the trigger in Configure (fields with * are required) in the nest s
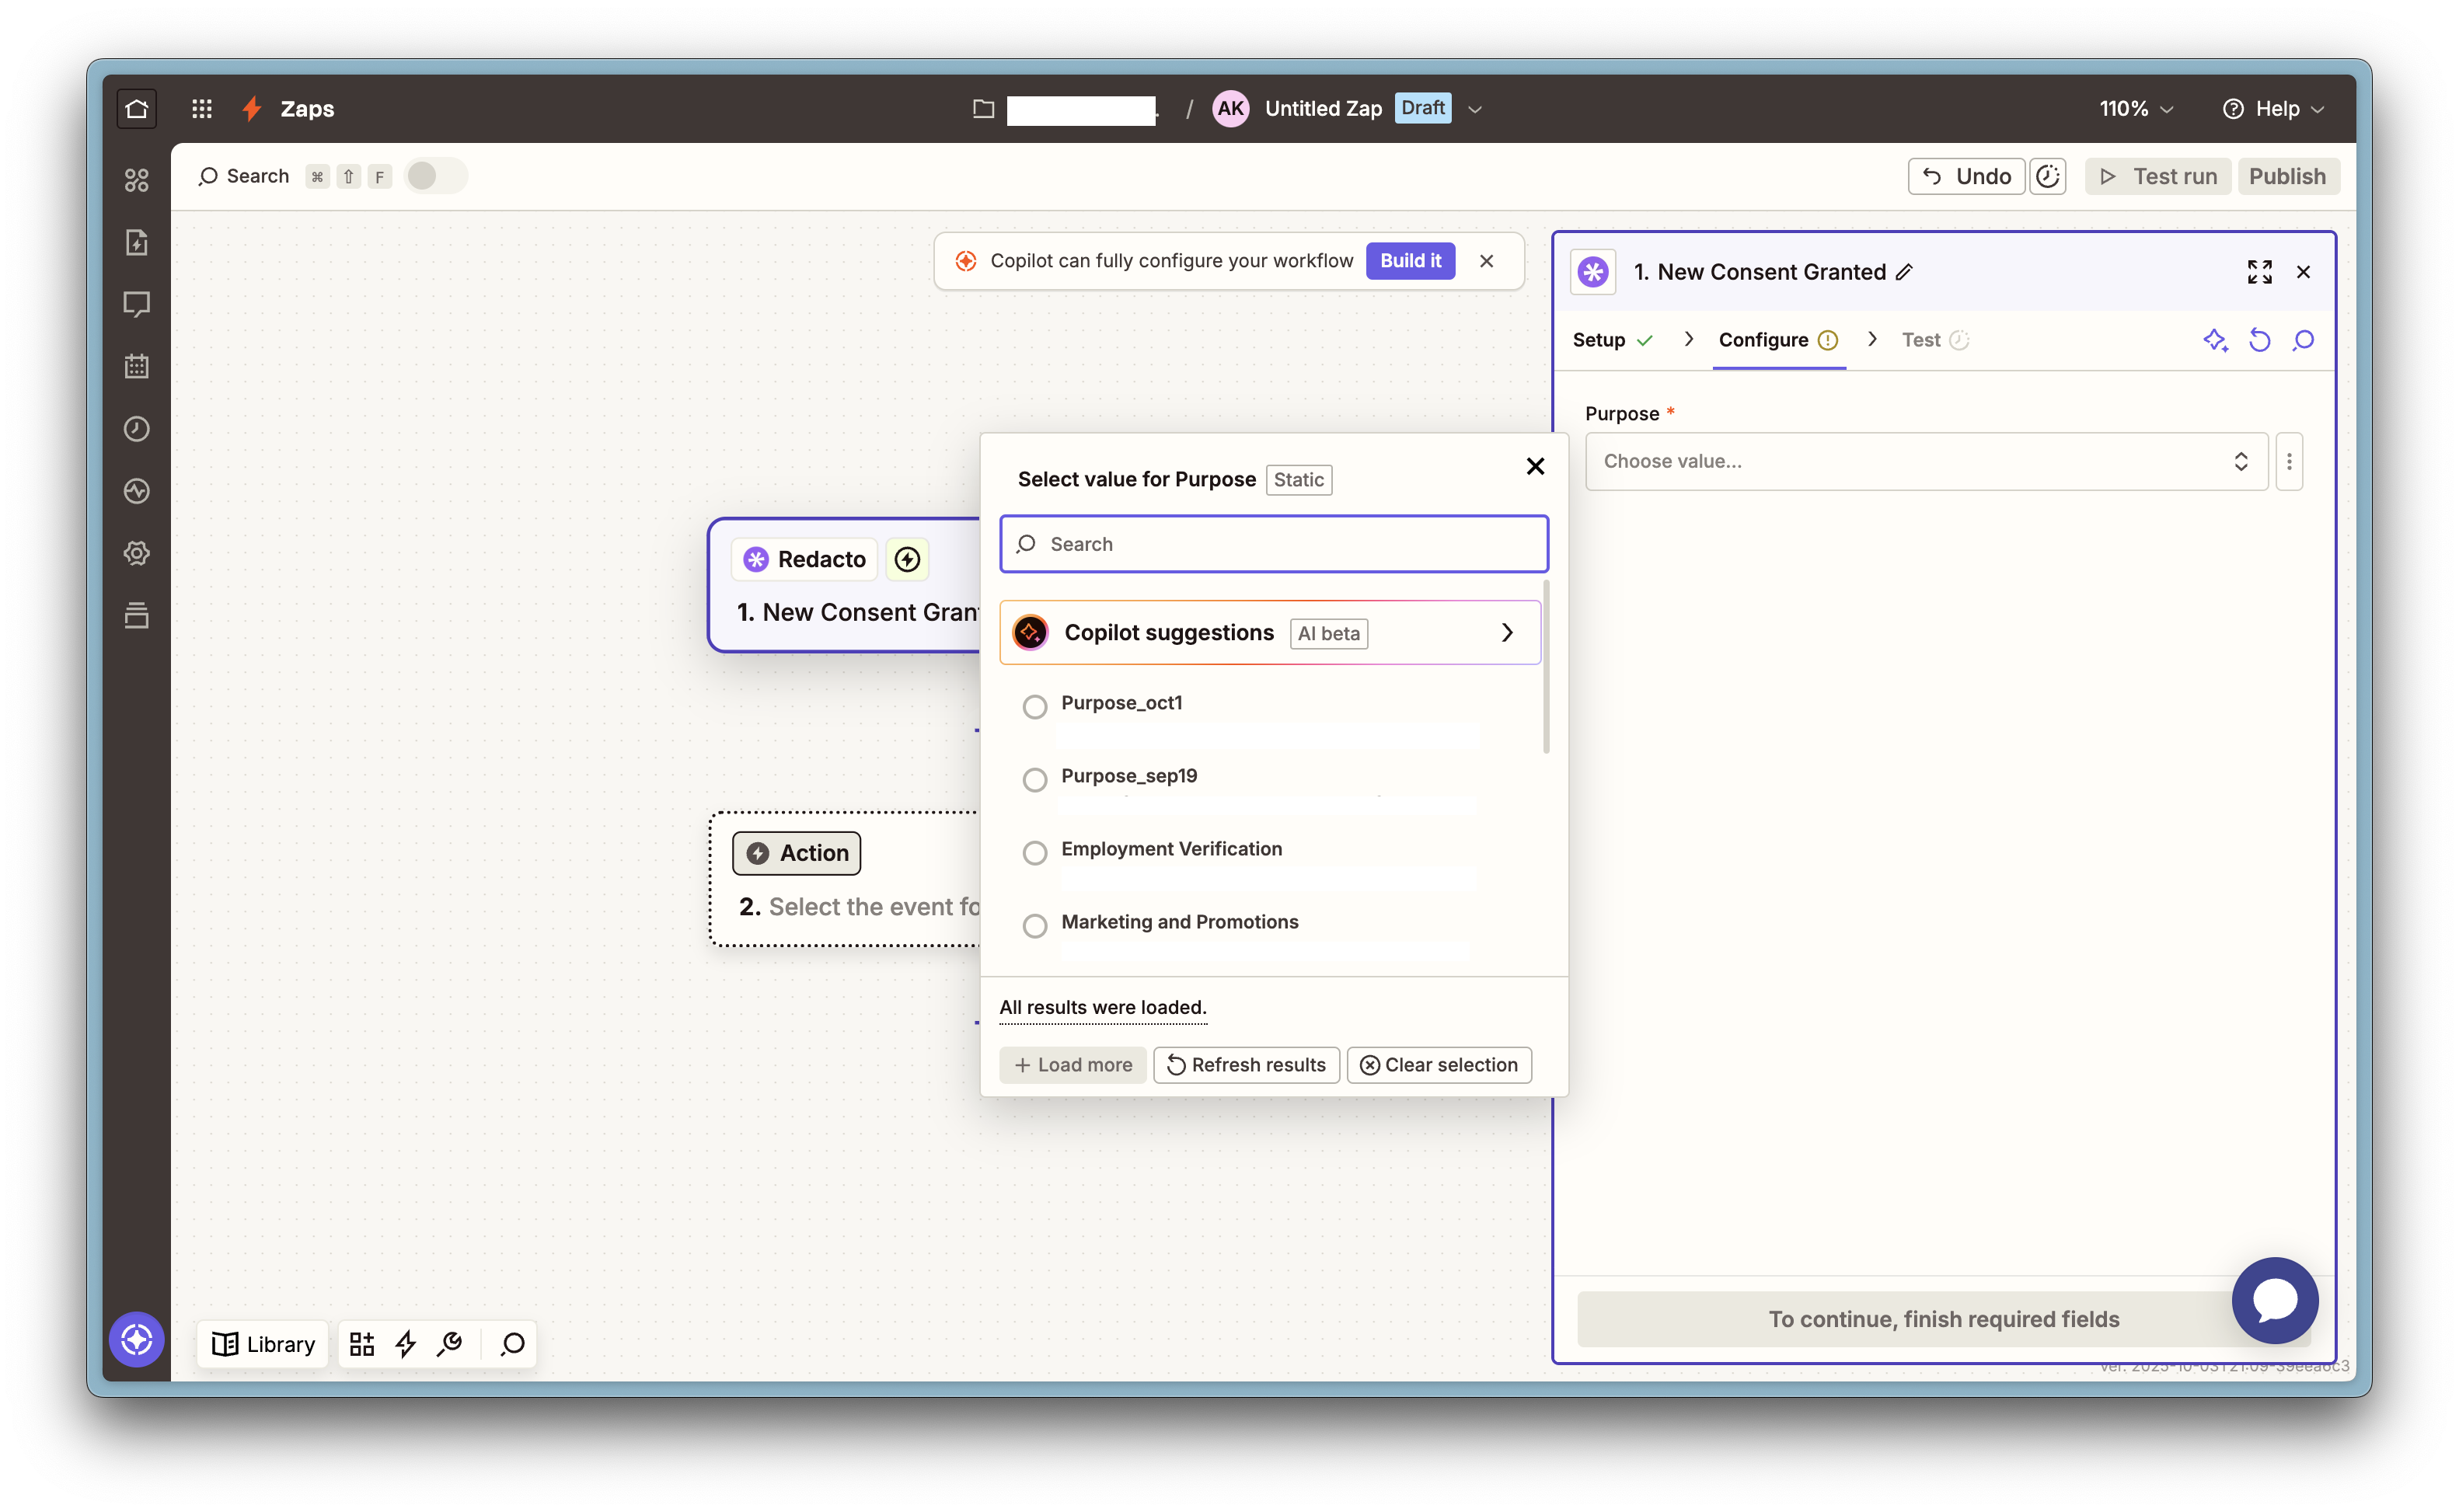
- Select a Purpose
- Redacto consents are scoped to resources called Purposes. Use the Configure tab to choose the exact Purpose to monitor. Subsequent runs of this Zap will only fire for consent events on this Purpose.
- You can see all the purposes configured in your organization listed here with their unique IDs.
- From this list, you can select purpose or a set of purposes and continue to the test tab. You can refer here for steps to configure a Zap with multiple purposes.
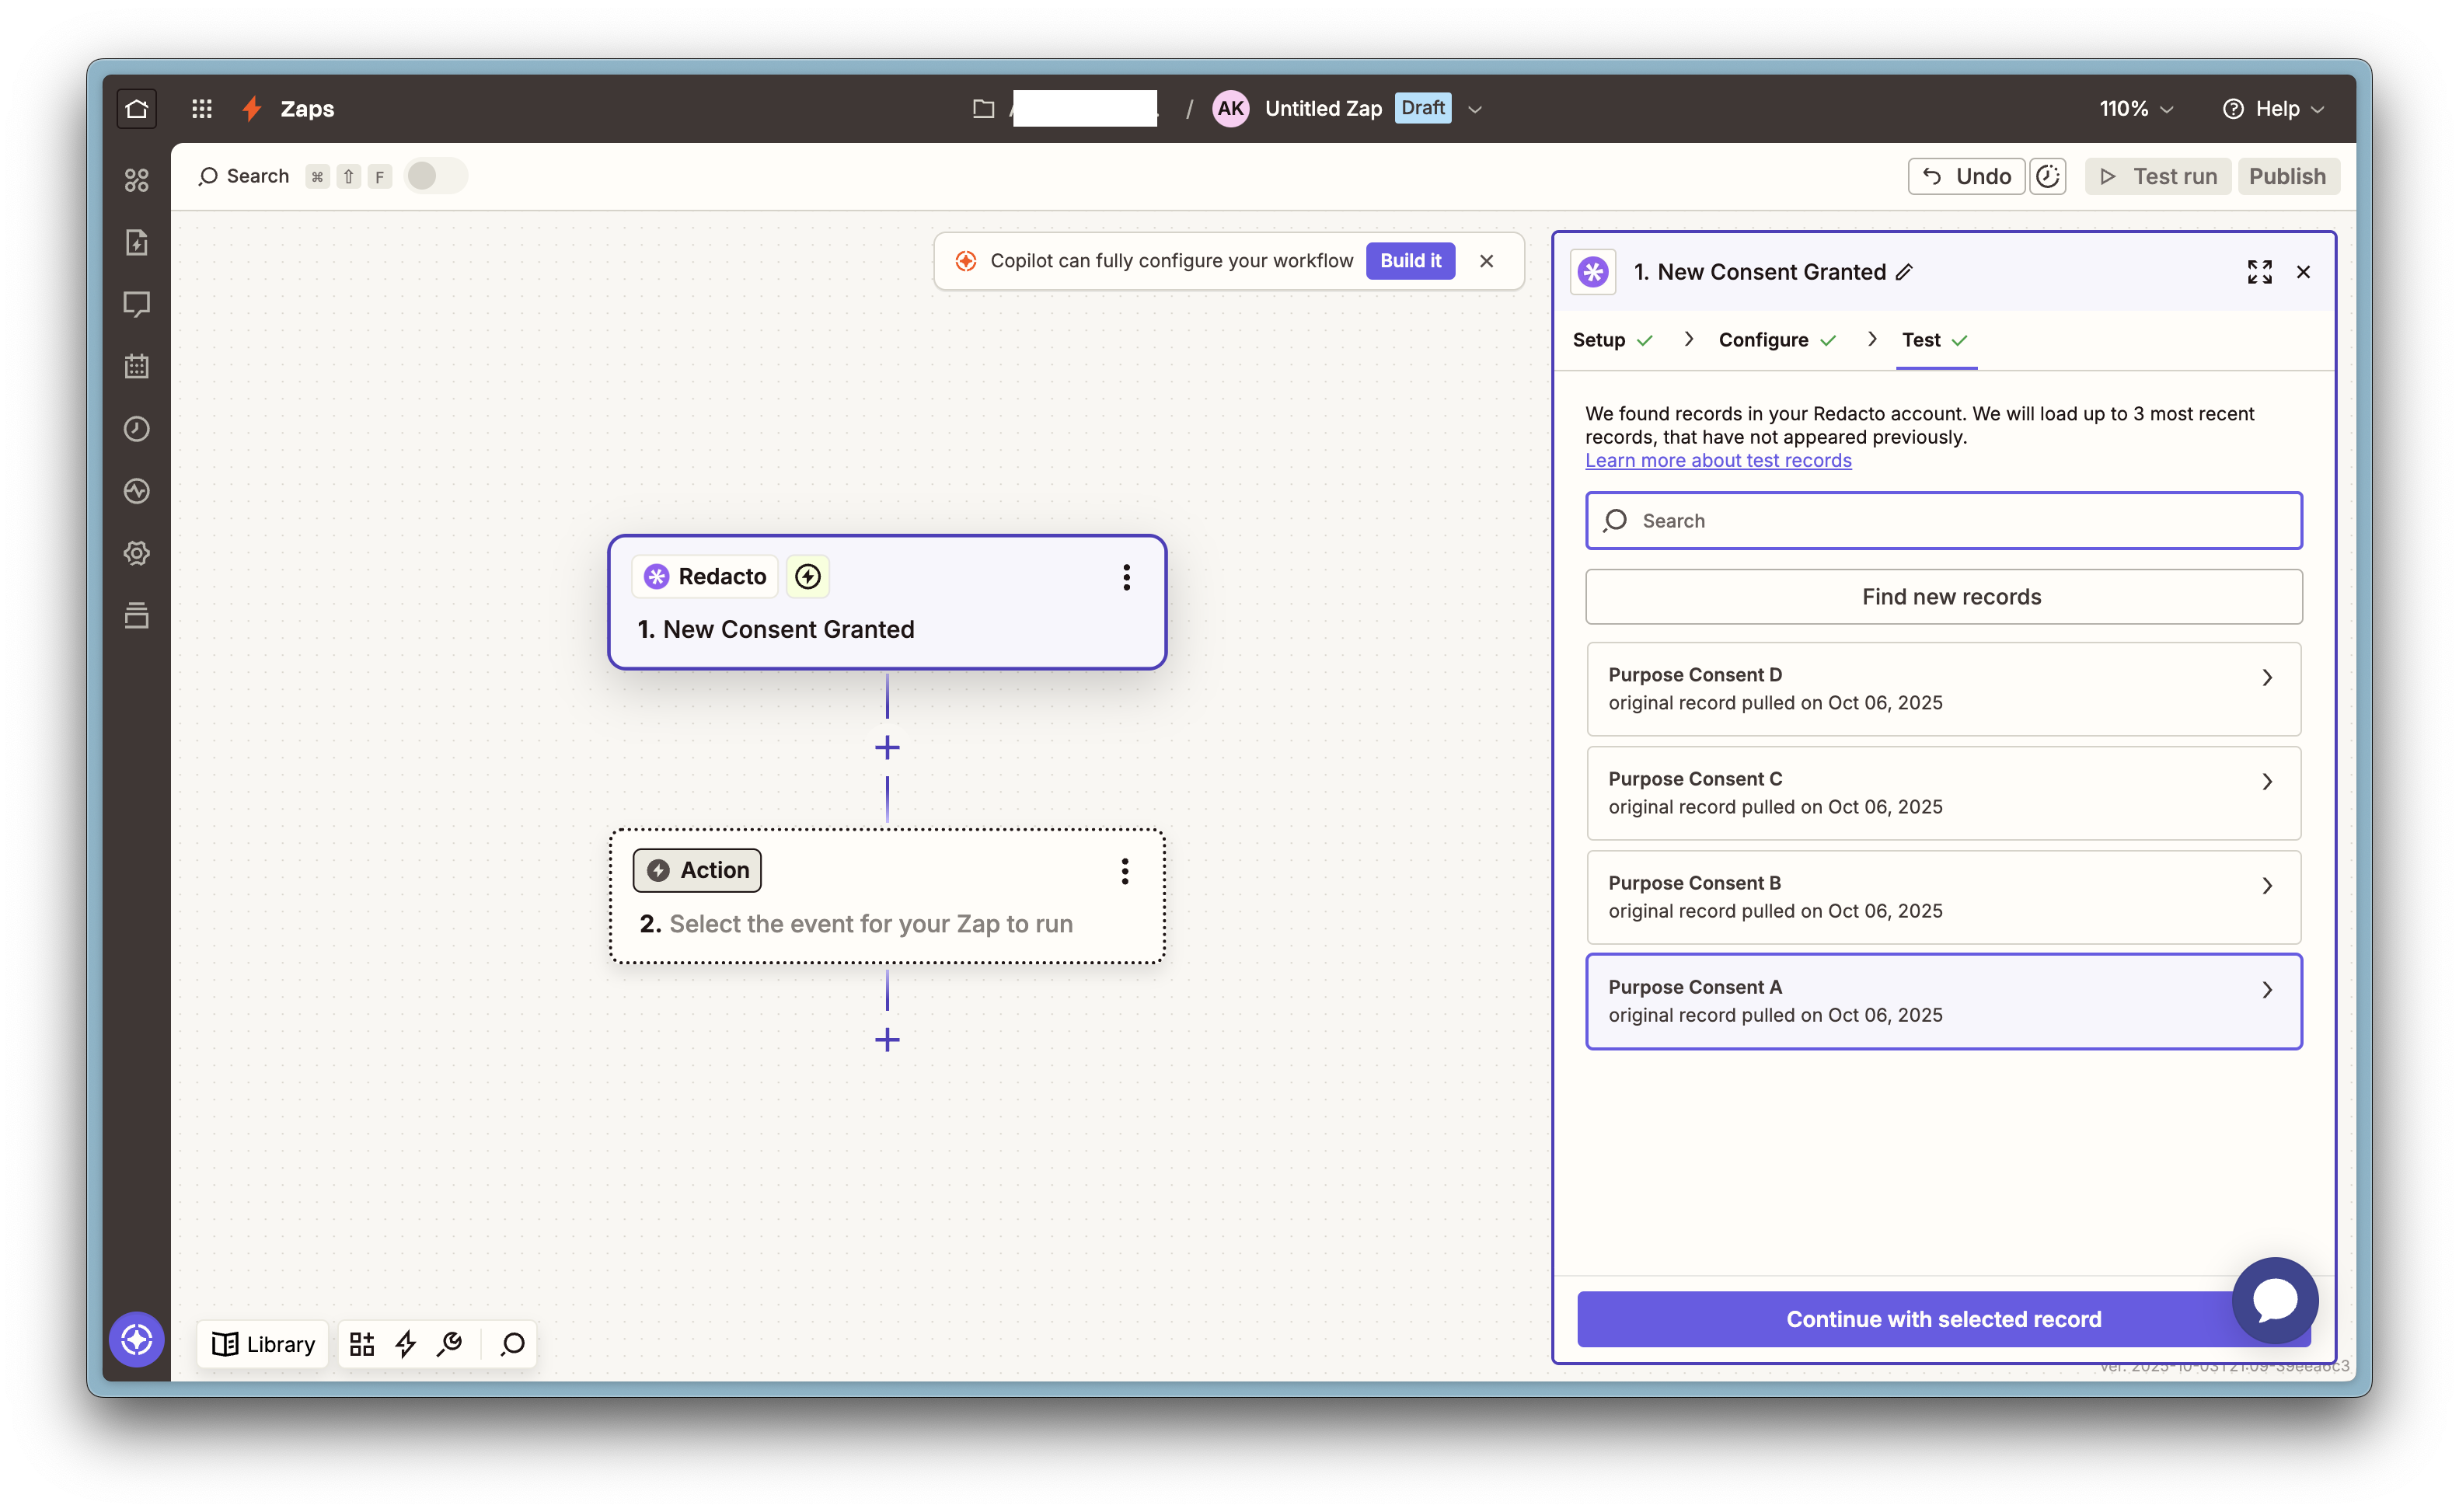
- Test the trigger i. Click the Test tab → Test trigger. Zapier will load one or more records that represent your Redacto consent events on the previously selected purposes.
- Add action steps (Slack, Gmail, Mailchimp — examples)
- After the trigger, add one or more actions to complete the workflow.  Example A — Slack: post a channel message
- Click + to add an Action → search Slack → Send Channel Message.
- Connect your Slack account when prompted.
- In Message Text, map Redacto fields from the trigger (e.g., purpose_name, consent_status, subject_email).
- Test step (Zapier will post a real message to the chosen channel). Example B — Gmail: send an email
- Add Gmail → Send Email.
- Connect Gmail.
- Map To, Subject, Body from trigger fields (e.g., send a notice when consent is revoked).
- Test step to send a live test email. Example C — Mailchimp: add/update subscriber
- Add Mailchimp → Add/Update Subscriber.
- Connect Mailchimp.
- Map Subscriber Email and optional fields/tags from Redacto fields (e.g., tag audience members by Purpose).
- Test step to create/update a contact.
-
Publish the Zap
- Click Publish (top right). After publishing, Zapier actively monitors the Redacto trigger and runs the action steps whenever the event occurs. You can confirm the publish status of your zap through the toggle on the top left corner of Zapier's editor -

PS: Zaps only trigger on new data after publish—historical events do not backfill runs.
Appendix
A) How to get a CMS API Key?
B) Steps to configure a Zap with multiple purposes.
C) Monitor runs & troubleshoot
Updated 9 days ago